How to make vanilla ice cream at home: a simple yet delicious recipe – घर पर वेनिला आइसक्रीम कैसे बनाएं: एक सरल लेकिन स्वादिष्ट रेसिपी
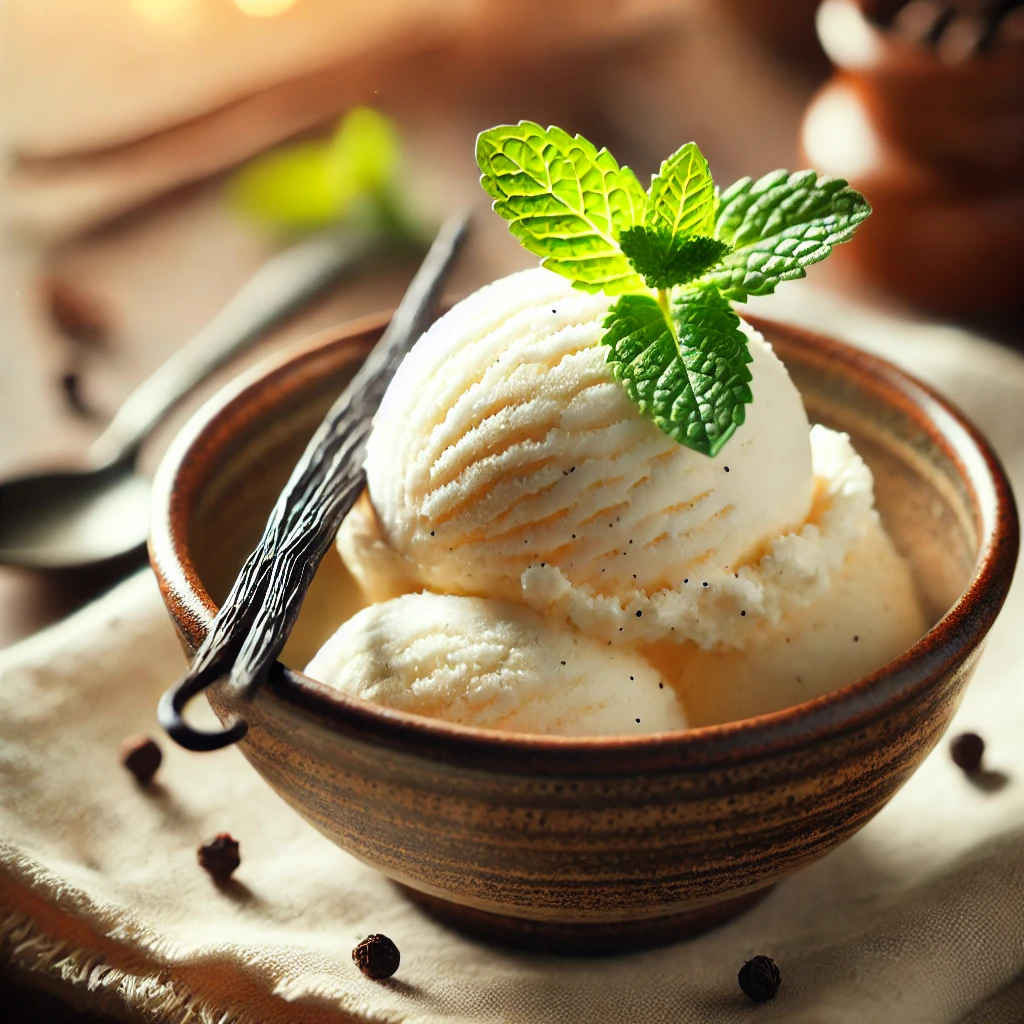
How to make vanilla ice cream at home
How to make vanilla ice cream at home
आइसक्रीम मेकर के बिना घर पर वेनिला आइसक्रीम बनाने की सरल विधि यहाँ दी गई है।
सामग्री:
2 कप (500 मिली) हैवी क्रीम
1 कप (250 मिली) पूरा दूध
¾ कप (150 ग्राम) दानेदार चीनी
2 चम्मच शुद्ध वेनिला एक्सट्रैक्ट
चुटकी भर नमक
निर्देश:
सामग्री मिलाएँ
एक मिक्सिंग बाउल में हैवी क्रीम, दूध, चीनी, वेनिला एक्सट्रैक्ट और नमक को तब तक फेंटें जब तक चीनी घुल न जाए।
मिश्रण को ठंडा करें
स्वादों को मिलाने के लिए कम से कम 2 घंटे (या रात भर) के लिए ढककर ठंडा करें।
बिना मशीन विधि का उपयोग करके फ़्रीज़ करें
मिश्रण को एक उथले, फ़्रीज़र-सुरक्षित कंटेनर में डालें।
30 मिनट के लिए फ़्रीज़ करें, फिर बर्फ के क्रिस्टल को तोड़ने के लिए कांटे से ज़ोर से हिलाएँ।
इसे हर 30 मिनट में लगभग 3-4 घंटे तक दोहराएँ, या जब तक आइसक्रीम चिकनी और मलाईदार न हो जाए।
सर्व करें
पूरी तरह जम जाने के बाद, आइसक्रीम को स्कूप करने से पहले 5 मिनट के लिए कमरे के तापमान पर रहने दें।
अपनी घर पर बनी वेनिला आइसक्रीम का आनंद लें! आप अतिरिक्त स्वाद के लिए चॉकलेट चिप्स, नट्स या फल जैसी टॉपिंग भी डाल सकते हैं।
घर पर वेनिला आइसक्रीम कैसे बनाएं: एक सरल लेकिन स्वादिष्ट रेसिपी
एक स्कूप स्वादिष्ट, मलाईदार वेनिला आइसक्रीम किसे पसंद नहीं होती? यह एक क्लासिक मिठाई है जो हर चीज़ के साथ खूबसूरती से मेल खाती है – पाई, ब्राउनी या यहाँ तक कि सिर्फ़ एक गर्म धूप वाला दिन। जबकि स्टोर से खरीदी गई आइसक्रीम सुविधाजनक है, घर पर खुद आइसक्रीम बनाने से एक ताज़गी और स्वाद की गहराई मिलती है जिसे हरा पाना मुश्किल है। साथ ही, इसे बनाना आश्चर्यजनक रूप से आसान है!
इस गाइड में, मैं आपको आइसक्रीम मेकर के बिना भी, घर पर वेनिला आइसक्रीम बनाने का तरीका बताऊँगा। चाहे आप शुरुआती हों या अनुभवी होम शेफ, यह चरण-दर-चरण रेसिपी आपको एक स्वादिष्ट व्यंजन बनाने में मदद करेगी जिसे आप बार-बार बनाना चाहेंगे।
घर पर आइसक्रीम क्यों बनाएँ?
आप सोच रहे होंगे – जब आप स्टोर से एक पिंट आइसक्रीम खरीद सकते हैं तो घर पर आइसक्रीम बनाने की परेशानी क्यों उठाएँ? यहाँ कुछ कारण दिए गए हैं:
बेहतर स्वाद और गुणवत्ता: आप सामग्री को नियंत्रित करते हैं, यह सुनिश्चित करते हुए कि कोई कृत्रिम स्वाद या संरक्षक न हों।
अनुकूलन: आप इसे क्रीमी, कम मीठा बनाने के लिए रेसिपी में बदलाव कर सकते हैं, या चॉकलेट चिप्स, नट्स या फल जैसे अपने पसंदीदा मिक्स-इन्स जोड़ सकते हैं।
मजेदार और फायदेमंद: अपने द्वारा बनाई गई मिठाई का आनंद लेने में कुछ खास बात होती है!
आहार नियंत्रण: यदि आप डेयरी-मुक्त, कम चीनी या कीटो-अनुकूल संस्करण पसंद करते हैं
होममेड वेनिला आइसक्रीम के लिए सामग्री
एक क्लासिक वेनिला आइसक्रीम बनाने के लिए, आपको केवल कुछ सरल सामग्री की आवश्यकता है:
2 कप (500 मिली) भारी क्रीम – यही वह है जो आइसक्रीम को इसकी मलाईदार बनावट देता है।
1 कप (250 मिली) पूरा दूध – चिकनाई जोड़ता है और क्रीम की समृद्धि को संतुलित करता है।
¾ कप (150 ग्राम) दानेदार चीनी – आइसक्रीम को मीठा करती है। आप अपनी पसंद के अनुसार समायोजन कर सकते हैं।
2 चम्मच शुद्ध वेनिला अर्क – स्वाद के लिए स्टार सामग्री। बेहतरीन स्वाद के लिए उच्च गुणवत्ता वाली वेनिला का उपयोग करें।
एक चुटकी नमक – स्वाद को बढ़ाता है और मिठास को संतुलित करता है।
💡 टिप: अगर आपको ज़्यादा स्वाद चाहिए, तो आप वेनिला बीन पेस्ट का इस्तेमाल कर सकते हैं या असली वेनिला बीन से बीज निकाल सकते हैं। इससे आपकी आइसक्रीम में वेनिला के खूबसूरत छींटे आ जाते हैं।
चरण-दर-चरण निर्देश
चरण 1: आइसक्रीम मिश्रण तैयार करें
एक मिक्सिंग बाउल में, हैवी क्रीम, दूध, चीनी, वेनिला एक्सट्रैक्ट और एक चुटकी नमक को एक साथ फेंटें। चीनी के पूरी तरह घुलने तक हिलाएँ।
💡 टिप: अगर आपको ज़्यादा स्वाद चाहिए, तो आप पहले दूध और चीनी को एक साथ गर्म कर सकते हैं, ताकि चीनी अच्छी तरह घुल जाए। हैवी क्रीम और वेनिला डालने से पहले इसे ठंडा होने दें।
चरण 2: मिश्रण को ठंडा करें
बाउल को प्लास्टिक रैप से ढक दें और कम से कम 2 घंटे (या रात भर) के लिए फ्रिज में रख दें। इससे फ्लेवर मिल जाते हैं और जमने पर आइसक्रीम चिकनी हो जाती है।
फ्रीजिंग के तरीके
आप अपनी वेनिला आइसक्रीम को दो तरीकों से फ्रीज कर सकते हैं- आइसक्रीम मेकर के साथ या उसके बिना।
विधि 1: आइसक्रीम मेकर का उपयोग करना
ठंडा मिश्रण अपने आइसक्रीम मेकर में डालें।
निर्माता के निर्देशों के अनुसार मथें (आमतौर पर 20-30 मिनट)।
मथने वाली आइसक्रीम को फ्रीजर-सेफ कंटेनर में डालें, ढक दें और लगभग 4 घंटे तक जमने दें जब तक कि यह जम न जाए।
विधि 2: आइसक्रीम मेकर नहीं है? कोई बात नहीं!
अगर आपके पास आइसक्रीम मशीन नहीं है, तो भी आप मैन्युअल फ्रीजिंग तकनीक से मलाईदार वेनिला आइसक्रीम बना सकते हैं।
मिश्रण को एक उथले, फ्रीजर-सेफ कंटेनर में डालें।
30 मिनट के लिए फ्रीज करें, फिर बर्फ के क्रिस्टल को तोड़ने के लिए कांटे से जोर से हिलाएं।
इस प्रक्रिया को हर 30 मिनट में लगभग 3-4 घंटे तक तब तक दोहराएं जब तक कि आइसक्रीम चिकनी और मलाईदार न हो जाए।
💡 टिप: हर बार हिलाते समय हैंड मिक्सर या व्हिस्क का उपयोग करने से आइसक्रीम चिकनी बनती है।
सर्व करना और स्टोर करना
आइसक्रीम पूरी तरह जम जाने के बाद, इसे स्कूप करने से पहले लगभग 5 मिनट के लिए कमरे के तापमान पर रहने दें। इससे इसे सर्व करना आसान हो जाता है और क्रीमी टेक्सचर भी निखर कर आता है।
इसे एयरटाइट कंटेनर में फ्रीजर में 2 सप्ताह तक स्टोर करें। अगर आप बर्फ के क्रिस्टल बनने से रोकना चाहते हैं, तो ढक्कन बंद करने से पहले आइसक्रीम के ऊपर सीधे प्लास्टिक रैप की एक परत दबाएँ।
मज़ेदार बदलाव और ऐड-इन्स
एक बार जब आप क्लासिक वेनिला आइसक्रीम में महारत हासिल कर लेते हैं, तो अलग-अलग स्वाद और मिक्स-इन के साथ प्रयोग क्यों नहीं करते? यहाँ कुछ विचार दिए गए हैं:
चॉकलेट चिप्स: वेनिला-चॉकलेट चिप कॉम्बो के लिए ½ कप चॉकलेट चिप्स मिलाएँ।
कुकी क्रम्बल्स: कुकीज़ और क्रीम के ट्विस्ट के लिए कुचले हुए ओरियो, शॉर्टब्रेड या ग्राहम क्रैकर्स मिलाएँ।
कारमेल स्विरल: फ़्रीज़ करने से पहले घर के बने कारमेल सॉस में घुमाएँ।
फ्रूट मिक्स-इन्स: फ्रूटी टच के लिए ताज़े या जमे हुए जामुन मिलाएँ।
मेवे और टॉपिंग: कटे हुए बादाम, पेकान या अखरोट कुरकुरापन देते हैं।
💡 प्रो टिप: हमेशा मथने के बाद (या बिना मशीन विधि का उपयोग करने पर अंतिम सरगर्मी चरण के बाद) ऐड-इन्स को मोड़ें ताकि वे समान रूप से वितरित रहें।
अक्सर पूछे जाने वाले प्रश्न (FAQ)
1. क्या मैं पूरे दूध के बजाय कम वसा वाले दूध का उपयोग कर सकता हूँ?
हाँ, लेकिन आइसक्रीम कम मलाईदार होगी। यदि कम वसा वाले दूध का उपयोग कर रहे हैं, तो समृद्धि बनाए रखने के लिए अतिरिक्त ½ कप भारी क्रीम जोड़ने पर विचार करें।
2. मैं डेयरी-मुक्त वेनिला आइसक्रीम कैसे बनाऊँ?
भारी क्रीम और दूध की जगह पूर्ण वसा वाले नारियल के दूध या बादाम के दूध का उपयोग करें। यदि आवश्यक हो तो डेयरी-मुक्त स्वीटनर का उपयोग करें।
3. मैं सॉफ़्ट-सर्व स्थिरता कैसे बनाऊँ?
सॉफ़्ट-सर्व बनावट के लिए, आइसक्रीम को मथें और इसे बिना ठोस रूप से जमाए तुरंत खाएँ।
4. क्या मैं चीनी के बजाय शहद या मेपल सिरप का उपयोग कर सकता हूँ?
हाँ! चीनी की जगह आधा कप शहद या ⅔ कप मेपल सिरप डालें। इससे स्वाद थोड़ा बदल जाएगा लेकिन फिर भी स्वादिष्ट रहेगा।
अंतिम विचार
घर पर वेनिला आइसक्रीम बनाना जितना आप सोचते हैं उससे कहीं ज़्यादा आसान है, और इसके नतीजे बिल्कुल इसके लायक हैं! चाहे आप इसे सादा या टॉपिंग से भरपूर खाएं, यह मलाईदार मिठाई निश्चित रूप से आपके परिवार की पसंदीदा होगी।
How to Make Homemade Vanilla Ice Cream: A Simple Yet Delicious Recipe
Who doesn’t love a scoop of rich, creamy vanilla ice cream? It’s a classic dessert that pairs beautifully with everything—pies, brownies, or even just a warm sunny day. While store-bought ice cream is convenient, making your own at home brings out a freshness and depth of flavor that’s hard to beat. Plus, it’s surprisingly easy to make!
In this guide, I’ll walk you through how to make homemade vanilla ice cream from scratch, even without an ice cream maker. Whether you’re a beginner or a seasoned home chef, this step-by-step recipe will help you create a delicious treat that you’ll want to make over and over again.
—
Why Make Ice Cream at Home?
You might be wondering—why go through the trouble of making ice cream at home when you can just grab a pint from the store? Here are a few reasons:
1. Better Flavor & Quality: You control the ingredients, ensuring no artificial flavors or preservatives.
2. Customization: You can tweak the recipe to make it creamier, less sweet, or add your favorite mix-ins like chocolate chips, nuts, or fruit.
3. Fun & Rewarding: There’s something special about enjoying a dessert you made from scratch!
4. Dietary Control: If you prefer dairy-free, low-sugar, or keto-friendly versions, you can easily adjust the ingredients.
—
Ingredients for Homemade Vanilla Ice Cream
To make a classic vanilla ice cream, you only need a handful of simple ingredients:
2 cups (500 ml) heavy cream – This is what gives ice cream its creamy texture.
1 cup (250 ml) whole milk – Adds smoothness and balances the richness of the cream.
¾ cup (150 g) granulated sugar – Sweetens the ice cream. You can adjust based on preference.
2 teaspoons pure vanilla extract – The star ingredient for flavor. Use high-quality vanilla for the best taste.
A pinch of salt – Enhances the flavors and balances the sweetness.
💡 Tip: If you want a richer flavor, you can use vanilla bean paste or scrape out the seeds from a real vanilla bean. This adds beautiful specks of vanilla throughout your ice cream.
—
Step-by-Step Instructions
Step 1: Prepare the Ice Cream Mixture
In a mixing bowl, whisk together the heavy cream, milk, sugar, vanilla extract, and a pinch of salt. Stir until the sugar is fully dissolved.
💡 Tip: If you want extra richness, you can heat the milk and sugar together first, allowing the sugar to dissolve more thoroughly. Let it cool before adding the heavy cream and vanilla.
Step 2: Chill the Mixture
Cover the bowl with plastic wrap and refrigerate for at least 2 hours (or overnight). This helps the flavors meld and makes the ice cream smoother when frozen.
—
Freezing Methods
There are two ways you can freeze your vanilla ice cream—with an ice cream maker or without one.
Method 1: Using an Ice Cream Maker
1. Pour the chilled mixture into your ice cream maker.
2. Churn according to the manufacturer’s instructions (usually 20-30 minutes).
3. Transfer the churned ice cream to a freezer-safe container, cover, and freeze for about 4 hours until firm.
Method 2: No Ice Cream Maker? No Problem!
If you don’t have an ice cream machine, you can still make creamy vanilla ice cream with a manual freezing technique.
1. Pour the mixture into a shallow, freezer-safe container.
2. Freeze for 30 minutes, then stir vigorously with a fork to break up ice crystals.
3. Repeat this stirring process every 30 minutes for about 3-4 hours until the ice cream becomes smooth and creamy.
💡 Tip: Using a hand mixer or whisk every time you stir helps make the ice cream smoother.
—
Serving and Storing
Once the ice cream is fully frozen, let it sit at room temperature for about 5 minutes before scooping. This makes it easier to serve and enhances the creamy texture.
Store in an airtight container in the freezer for up to 2 weeks. If you want to prevent ice crystals from forming, press a layer of plastic wrap directly on top of the ice cream before closing the lid.
—
Fun Variations & Add-Ins
Once you’ve mastered classic vanilla ice cream, why not experiment with different flavors and mix-ins? Here are some ideas:
Chocolate Chips: Stir in ½ cup of chocolate chips for a vanilla-chocolate chip combo.
Cookie Crumbles: Add crushed Oreos, shortbread, or graham crackers for a cookies-and-cream twist.
Caramel Swirl: Swirl in homemade caramel sauce before freezing.
Fruit Mix-ins: Fold in fresh or frozen berries for a fruity touch.
Nuts & Toppings: Chopped almonds, pecans, or walnuts add crunch.
💡 Pro Tip: Always fold in add-ins after churning (or after the last stirring step if using the no-machine method) so they stay evenly distributed.
—
Frequently Asked Questions (FAQs)
1. Can I use low-fat milk instead of whole milk?
Yes, but the ice cream will be less creamy. If using low-fat milk, consider adding an extra ½ cup of heavy cream to maintain richness.
2. How do I make dairy-free vanilla ice cream?
Swap heavy cream and milk for full-fat coconut milk or almond milk. Use a dairy-free sweetener if needed.
3. How do I make soft-serve consistency?
For a soft-serve texture, churn the ice cream and eat it immediately without freezing it solid.
4. Can I use honey or maple syrup instead of sugar?
Yes! Substitute ½ cup honey or ⅔ cup maple syrup in place of sugar. It will slightly change the flavor but still be delicious.
—
Final Thoughts
Making homemade vanilla ice cream is easier than you think, and the results are absolutely worth it! Whether you enjoy it plain or loaded with toppings, this creamy dessert is sure to be a family favorite.
Give it a try and let me know how it turns out! Have any favorite ice cream flavors or mix-in ideas? Share them in the comments below!
Happy scooping!